Creating a project for Elastic Personas involves several steps to ensure a comprehensive and effective implementation. In this article, we will cover the following detailed steps:
Step 1:
- Create your own template
- Create a predefined template
Step 2:
- Setup blocks
- Adding blocks
- Edit blocks
- Remove blocks
- Delete blocks
- Add greetings
- Setup Questionnaire
- Adding questions
- Edit questions
- Rearrange questions order
- Duplicate questions
Step 3:
- Add listing
- Create lists
- Generate Shareable URL
Step 4:
- Set Project delivery time
- Set Project duration
- Set Redirection
- Enter email subject
Step 1 > Setup
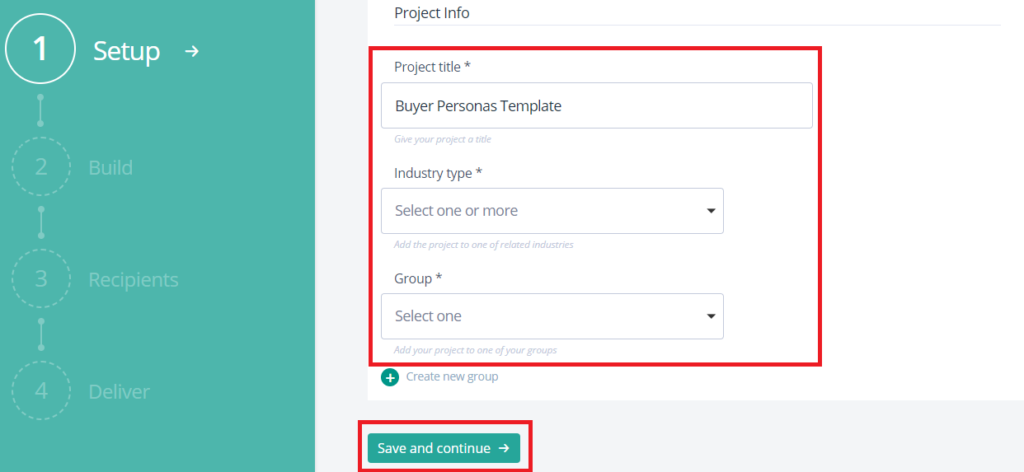
How to create your own template?
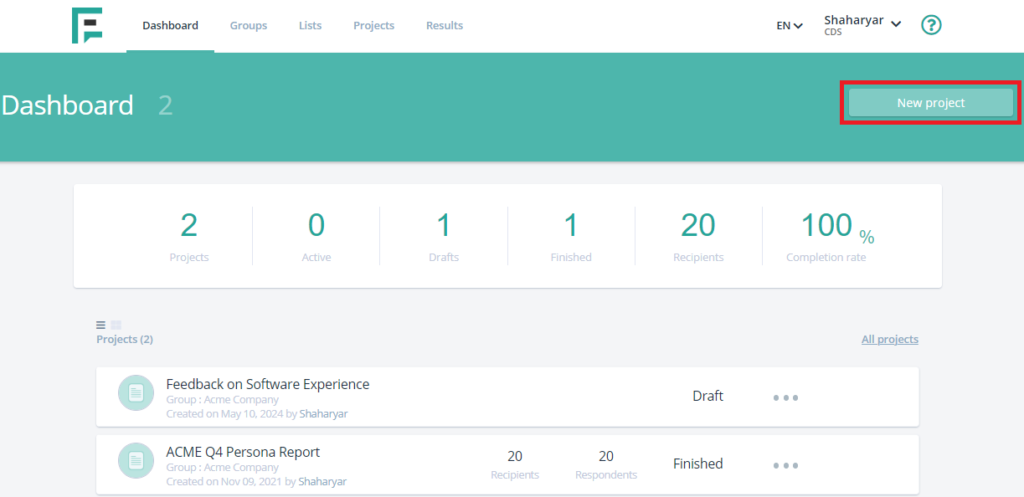
- Navigate to the Elastic Personas dashboard and click the “New Project” button.

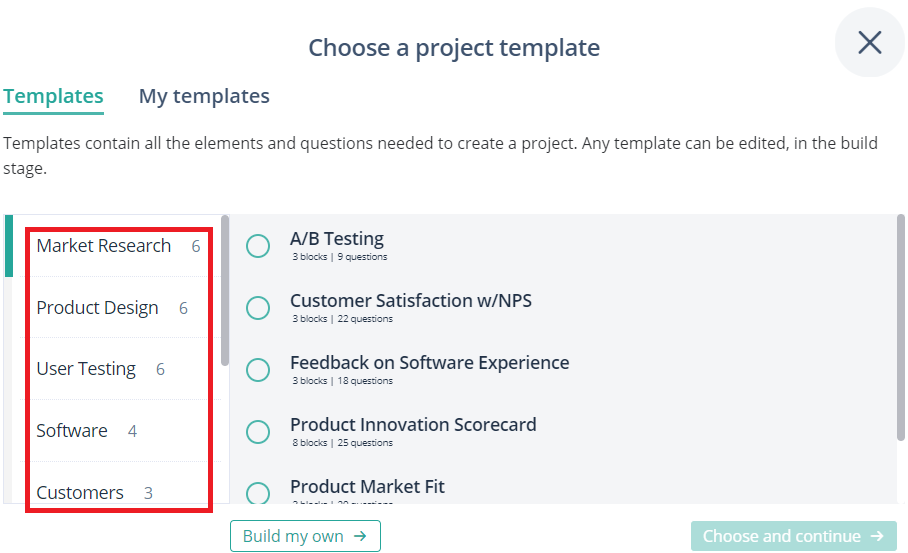
- You can select a predefined template or create your own by clicking “Build My Own.”
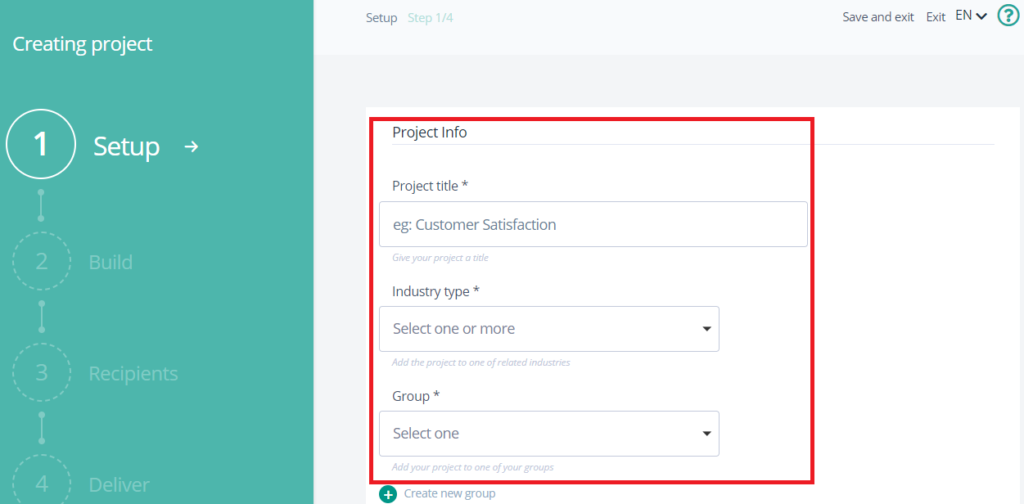
- Enter the project title, industry name and group then click Save and continue. (If you haven’t setup groups you can simply click +Create new group)
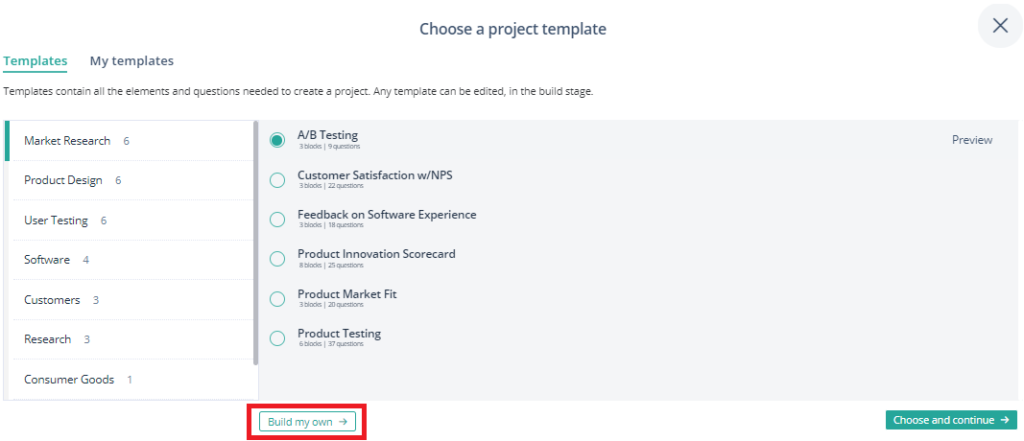
How to choose a predefined template?
- Go to the Elastic Personas dashboard and Click the New Project button.
- You can select any predefined template from the list.
- Click Choose and Continue
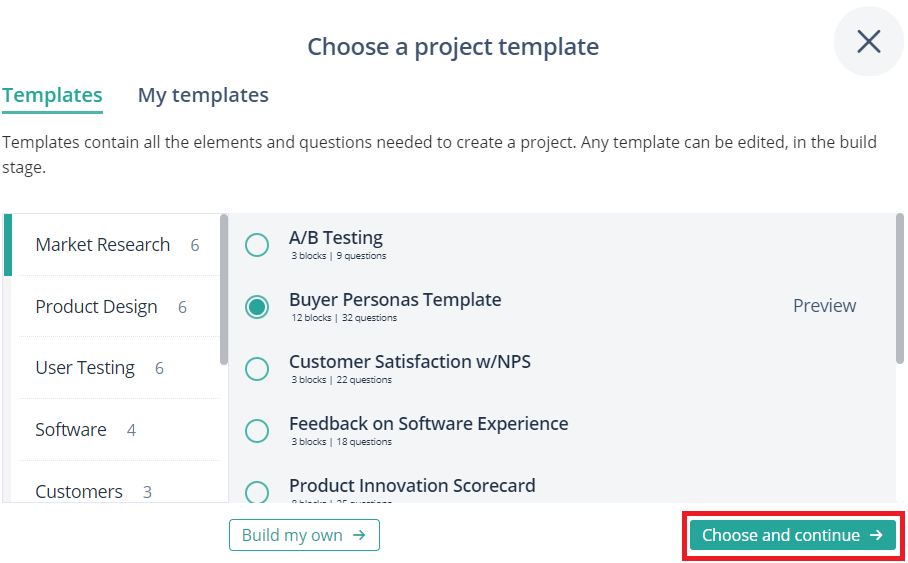
- Enter the project title, select the industry type and group, then click “Save and Continue.”
Step 2 > Build
How to add blocks?
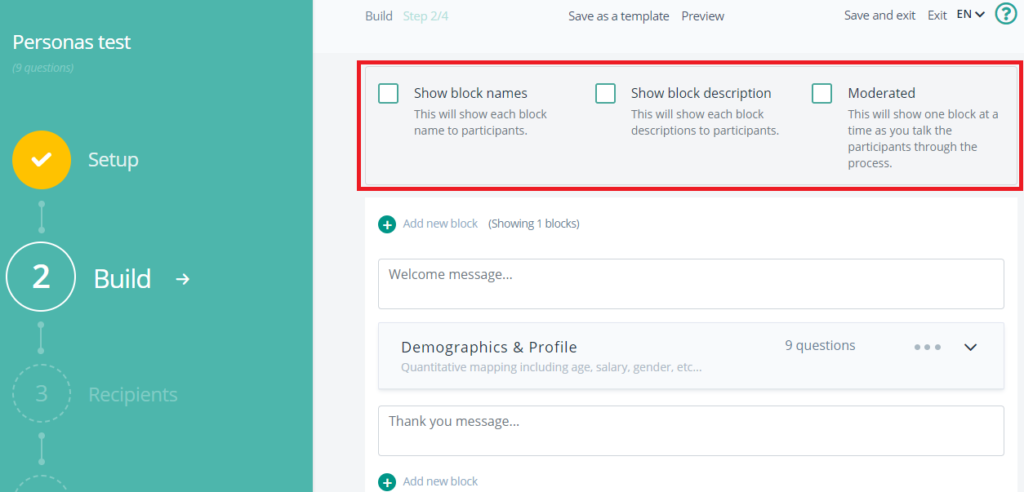
Configure the block settings to decide whether to display the block name and description. There are three types of block settings available:
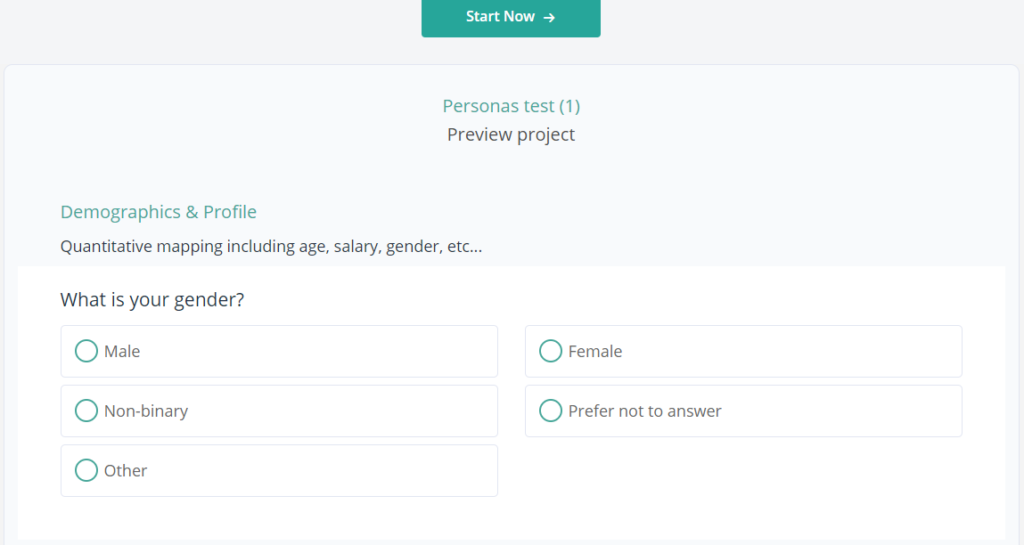
1. Show Block names: This will show each block name to the participant.
- Enable the “Show Block names” option to display each block name to the participants. Then, click on the “Preview” to see what it looks like.
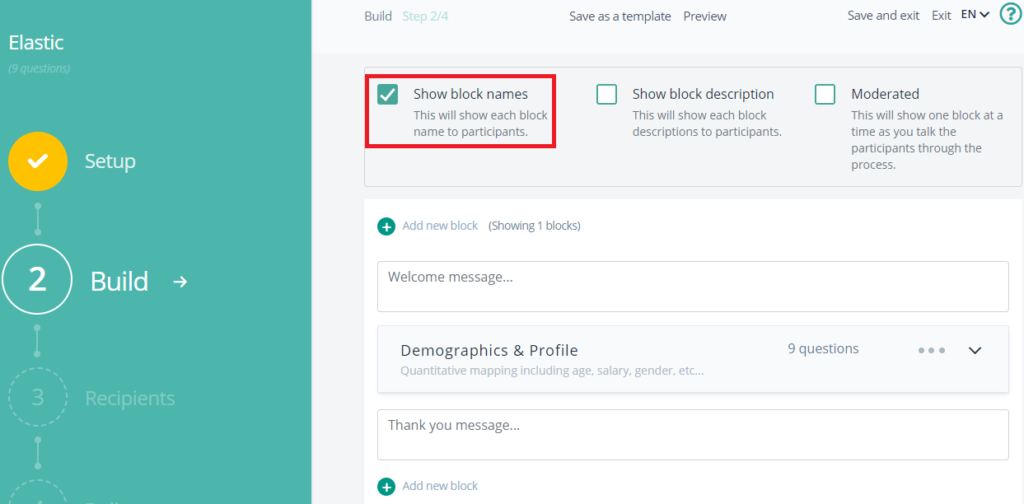
- Block name displayed in the survey.

2. Show Block Description: This will show each block description to the participant.
- Enable the “Show Block description” option to display each block description to the participants. Then, click on the “Preview” to see what it looks like.
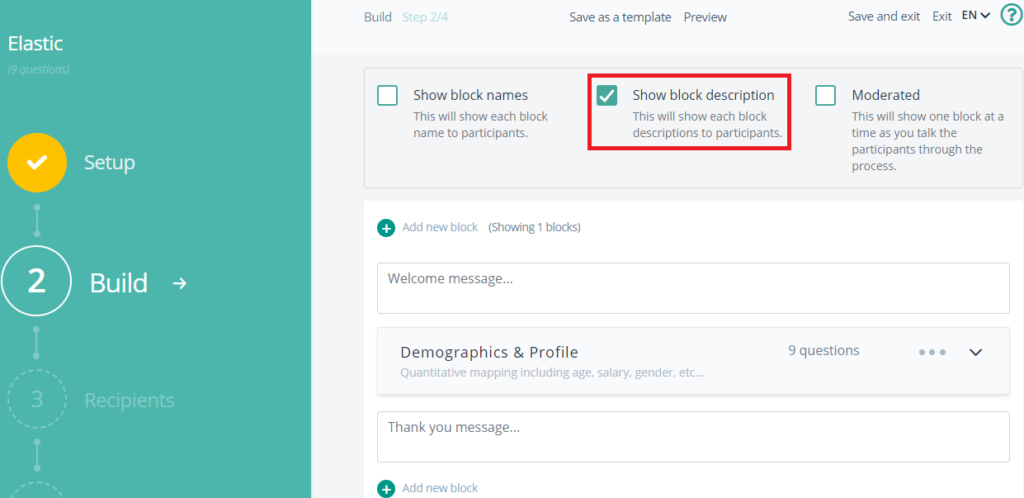
- Block description displayed in the survey.
3. Moderate: This will display each block at a time, allowing you to guide the participants through the process.
- Enable the “Moderated option” to display each block at a time, allowing you to guide the participants through the process. Then, click on the “Preview” to see what it looks like.
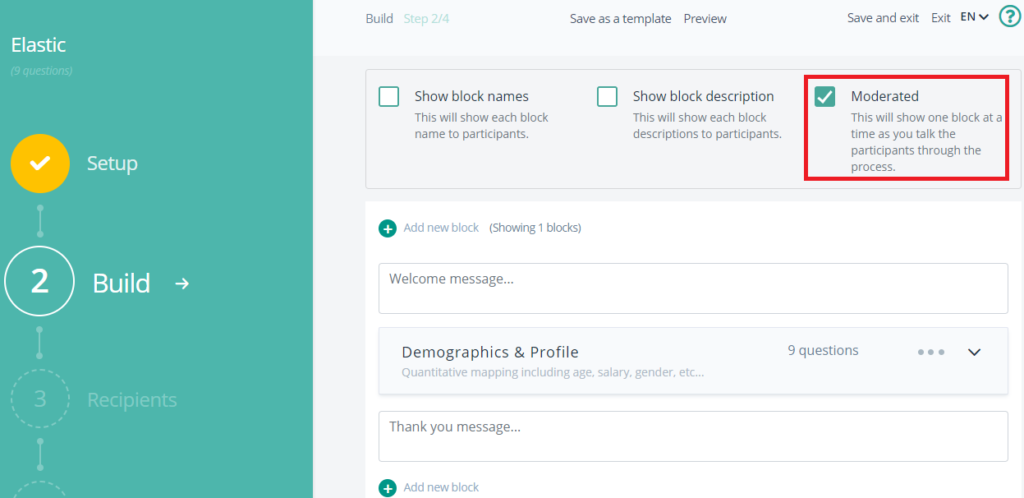
- Block moderation shown in the survey.
- Choose the block settings according to your preference.
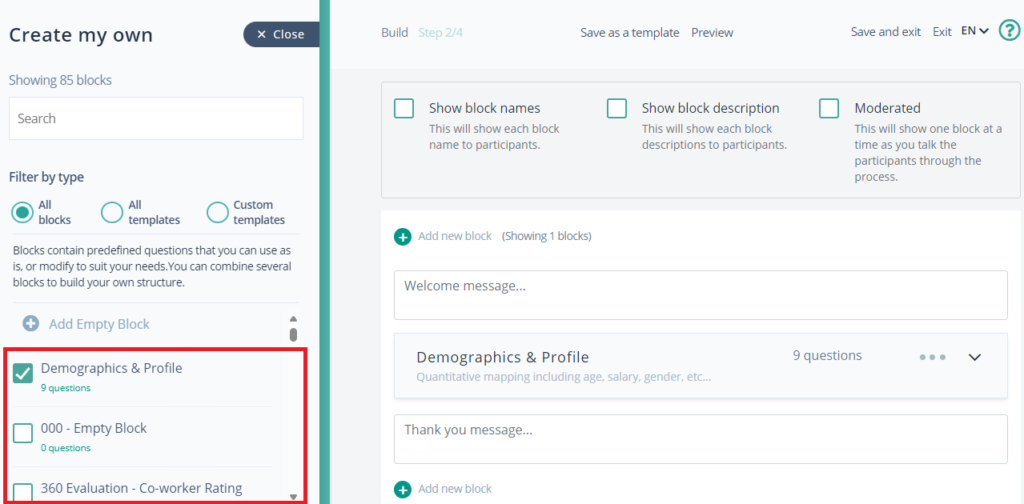
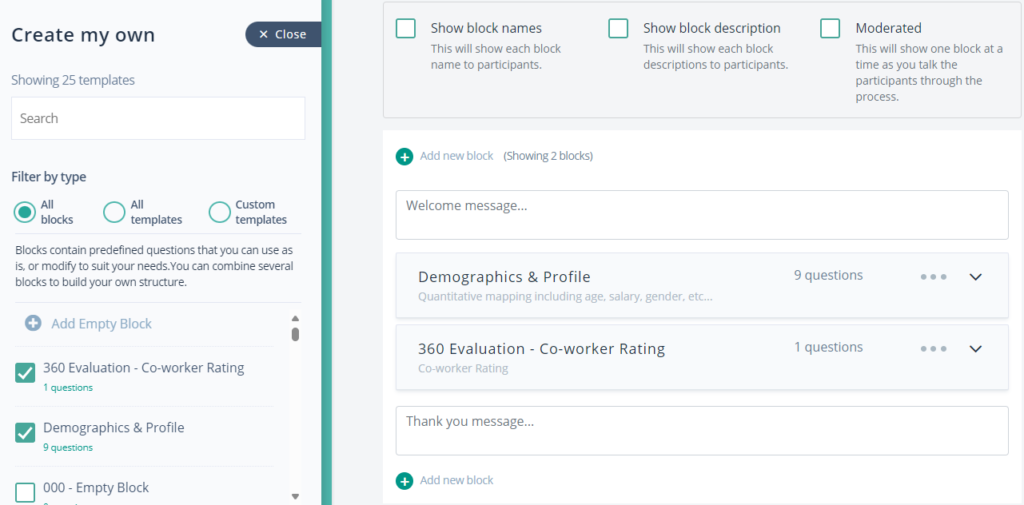
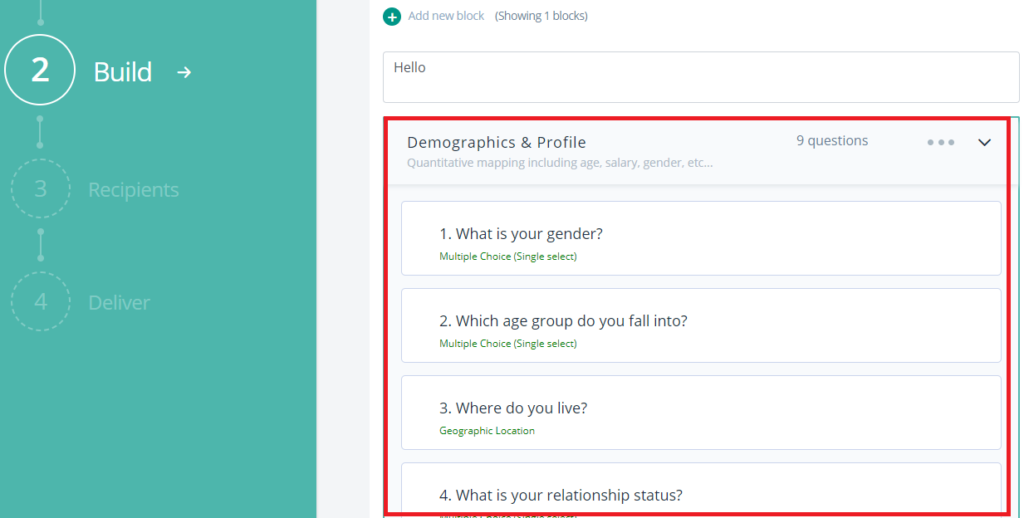
- If you want to add more blocks, just click the “+ Add new block” button.
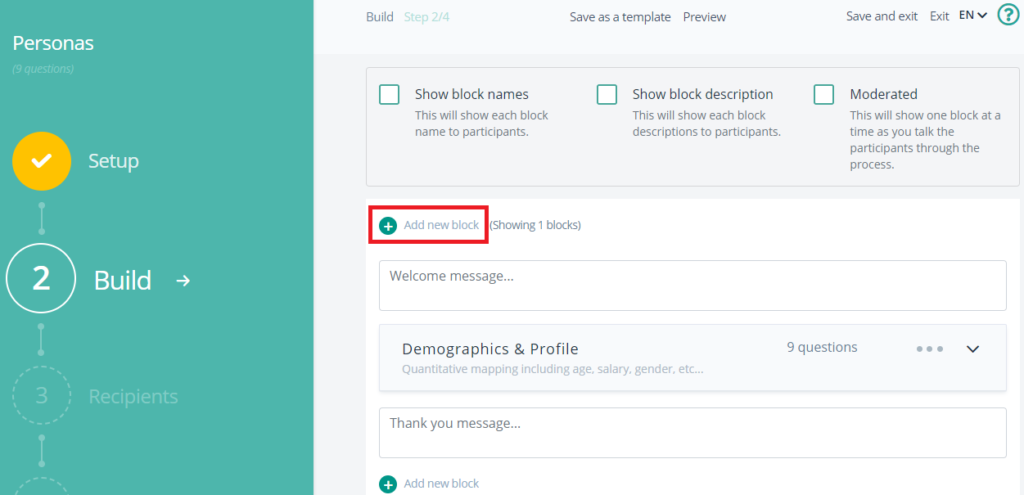
- Tick the block you want to add.(As an example we have selected Demographics & Profile)
- Block has been added.
- To save your design for future use, click “Save as Template” at the top. Your custom design will now be stored under “My Templates.”
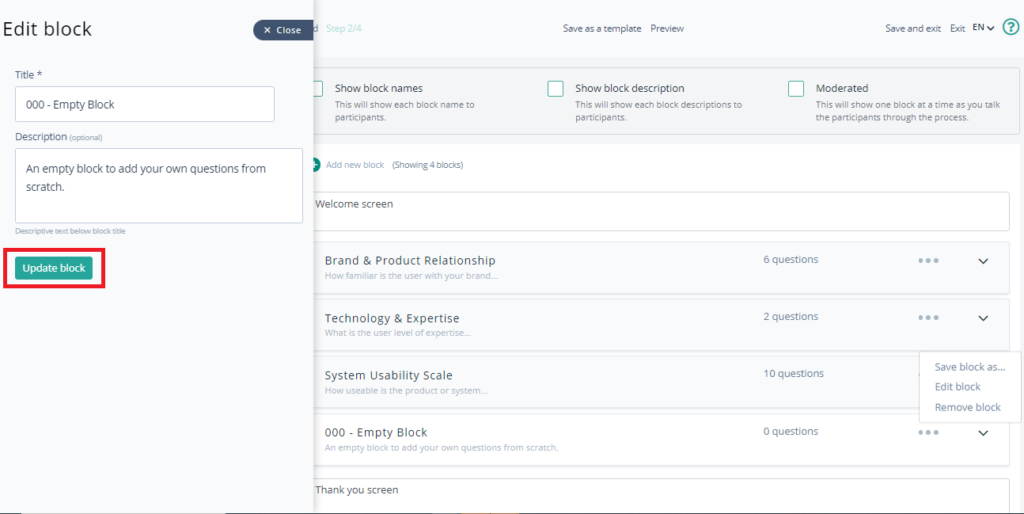
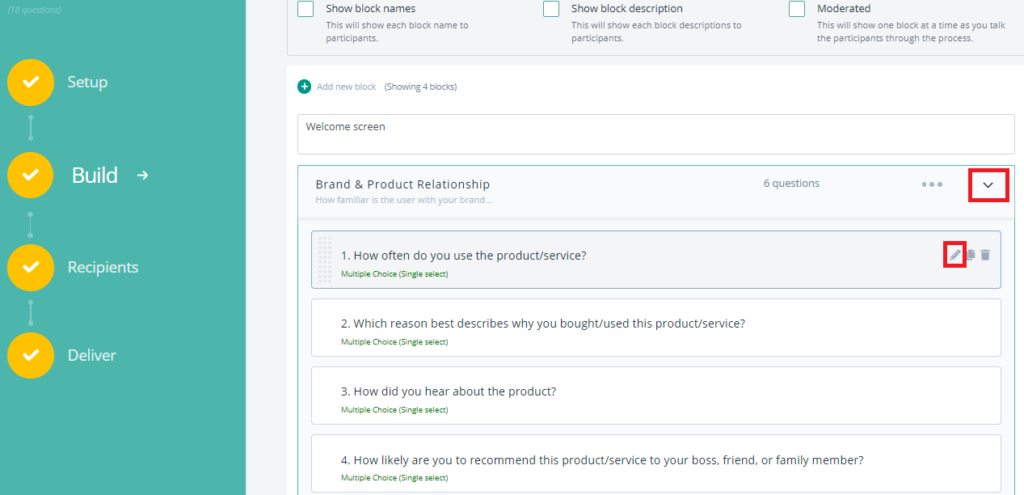
How to edit/remove blocks?
- Click the preferences icon to edit the block.
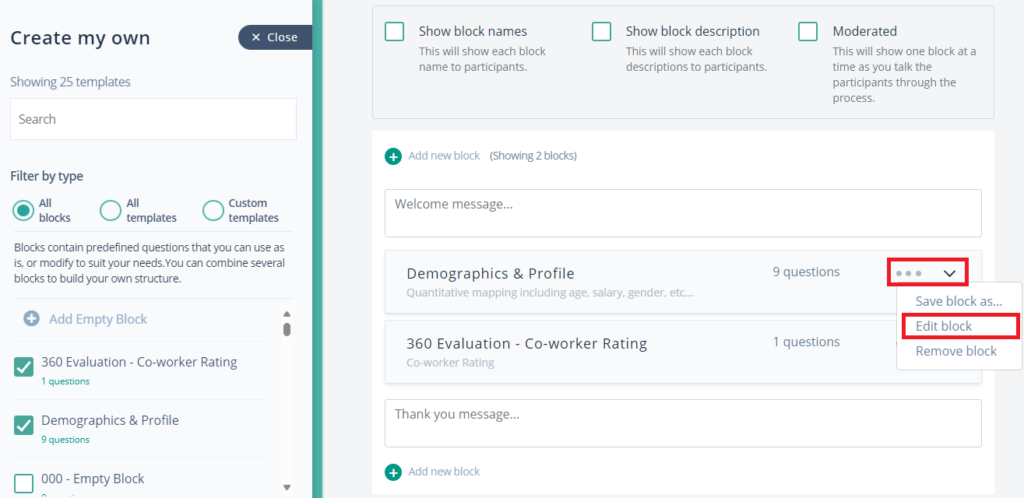
- You can change the block title and description then click Update Block.
- Click the preferences icon to remove the block.
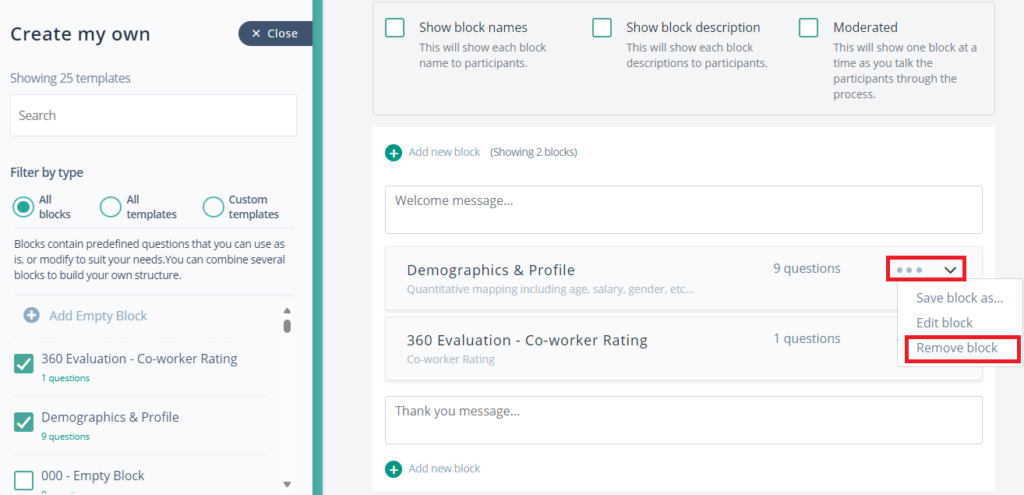
- When you click “Remove Block,” the selected block will be deleted.
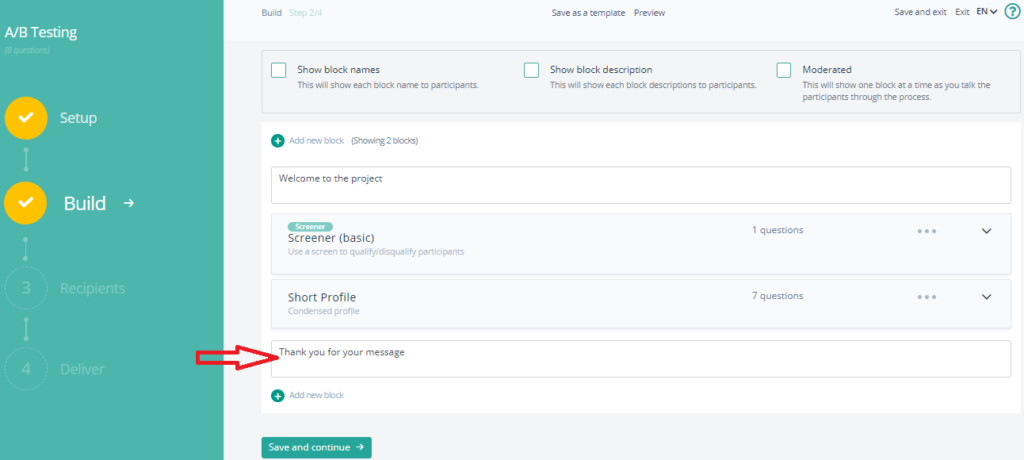
How to add Greetings?
- Enter the Welcome message for your project.
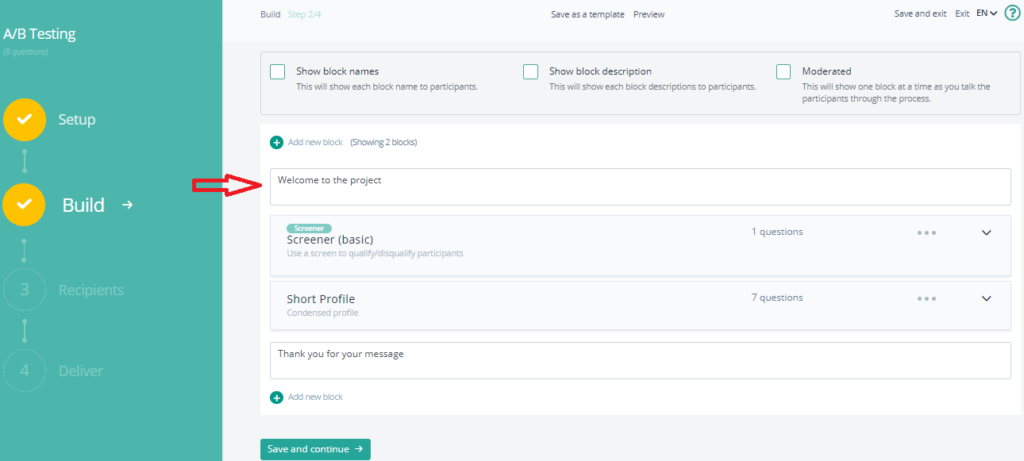
- Enter the Thank you (ending message) then click Save and continue.
How to set up a Questionnaire?
- Configure the questionnaire according to your project requirements.
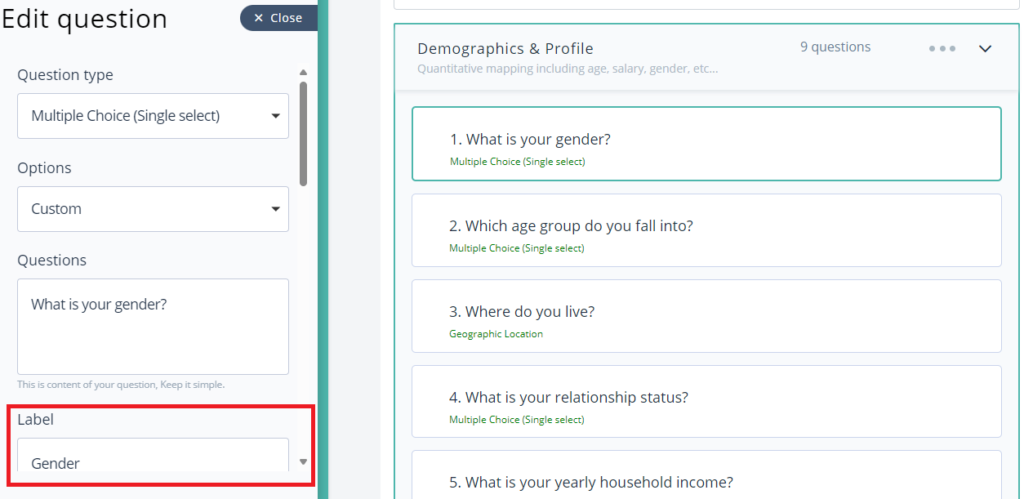
- To modify the question, click the dropdown arrow and then choose the ‘edit’ option.
- You can modify the questions and customize the options to suit your needs. At this stage, you can also assign a label to your report, which will help generate the report based on the specific tag you have chosen.
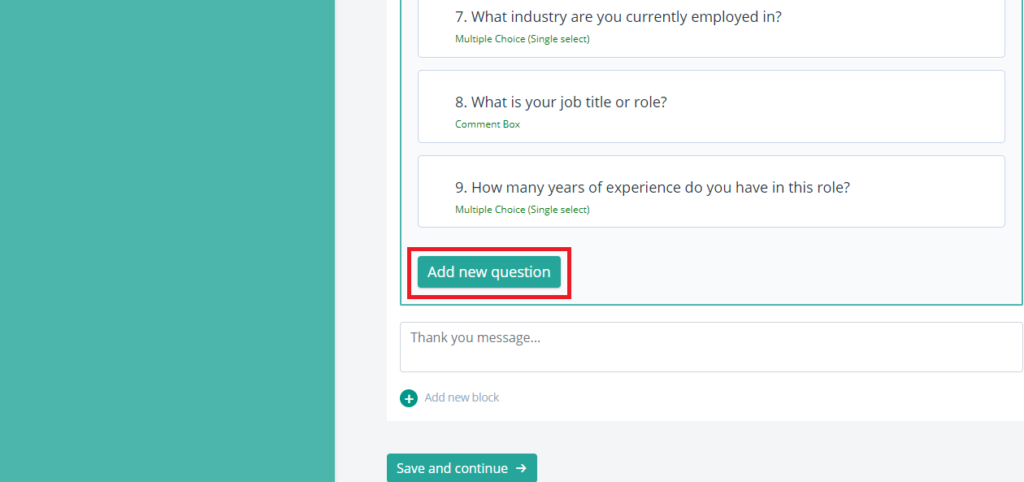
- The selected template contains predefined questions, but additional questions can be added by clicking “Add New Question.”
Note: Multiple types of questions are available:
Multiple choice (single select): Choose one option from a list of choices.
Multiple choice (multi select): Select multiple options from a list of choices.
Drop down selector (single select): Pick one option from a dropdown menu.
Drop down selector (multi select): Choose multiple options from a dropdown menu.
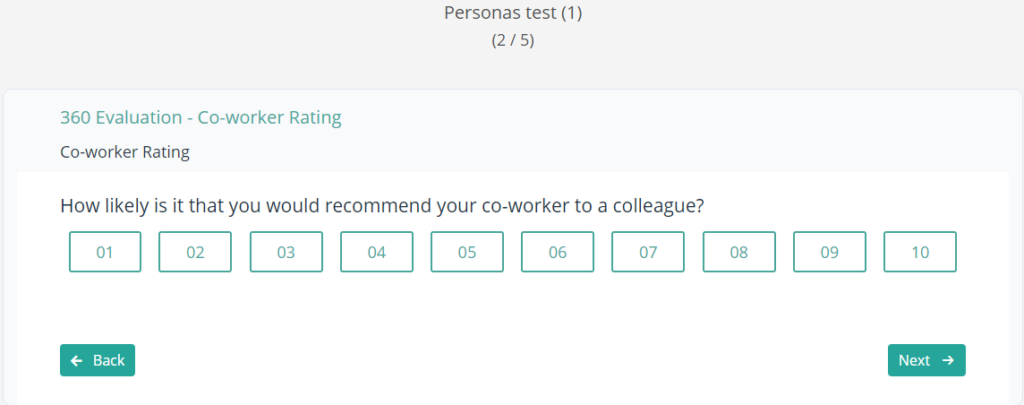
Rating scale: Rate something on a numerical or descriptive scale.
Comment box: Provide a text-based response or feedback.
Number field: Enter a numerical value.
Star rating: Rate something using a system of stars.
Scores: Assign a score or value to something based on set criteria.
Demographic location: Specify a geographical location.
Visual choice: Select an option from a set of images or icons.
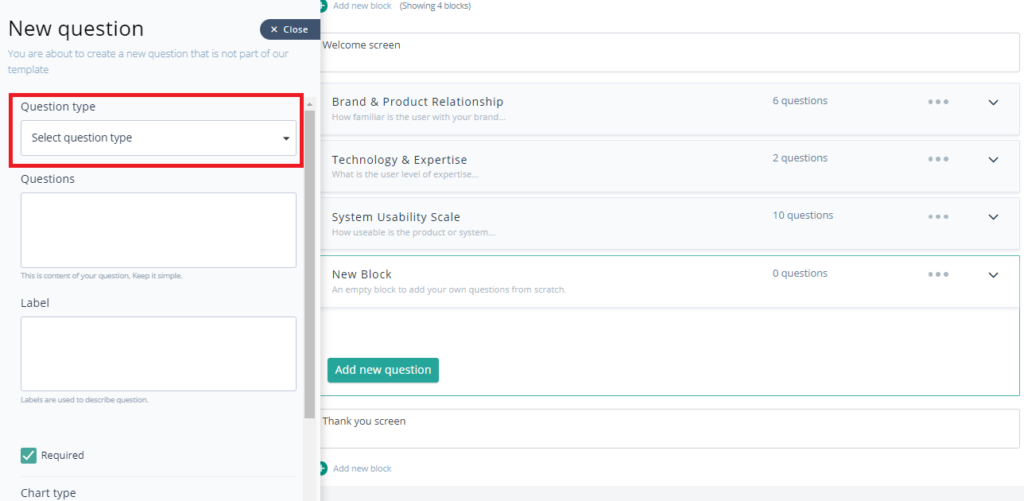
- Select the question type first. Then write the question and label it accordingly.
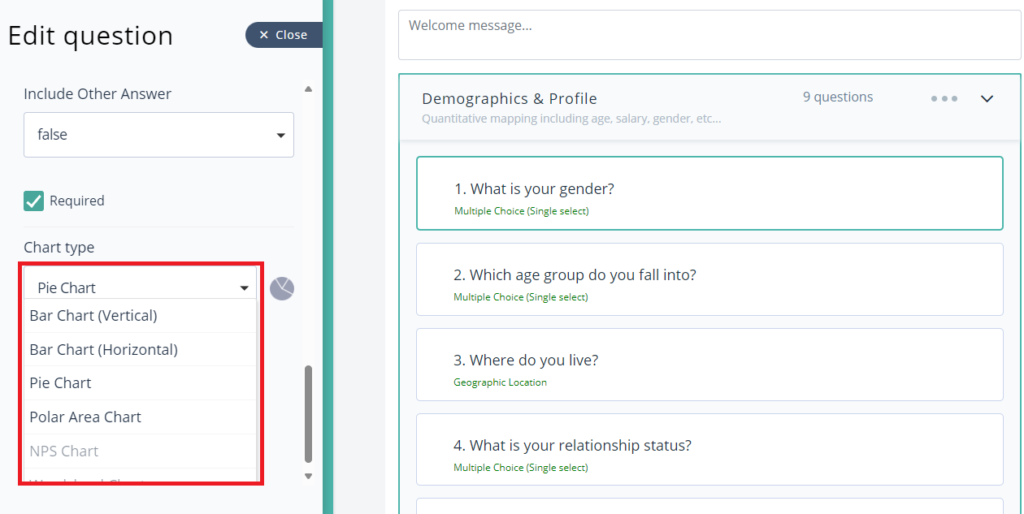
- Scroll down to find the option to select the chart type. Utilizing charts with Elastic Personas can greatly improve your project’s clarity and impact.
Chart types we have:
Bar chart: Display data using rectangular bars to show comparisons among categories.
Pie chart: Represent data as slices of a circle to illustrate proportional relationships.
Polar area chart: Show data in a circular graph where each segment extends outward from the center based on its value.
NPS chart: Visualize Net Promoter Score data to measure customer loyalty and satisfaction.
Word cloud chart: Display text data where the size of each word indicates its frequency or importance.
- Choose the chart type and then click Update.
- You can rearrange the order of the questions by simply dragging and dropping them. The question numbering will automatically adjust to reflect the new sequence.
Step 3 > Recipients
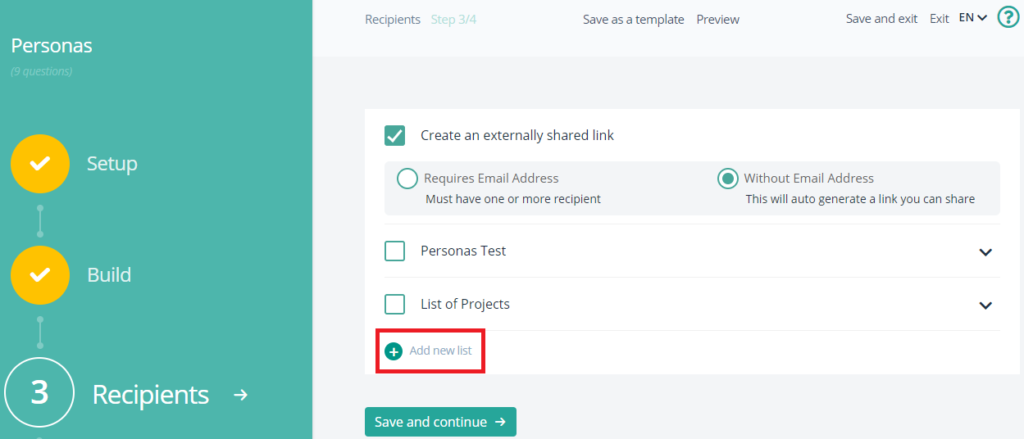
- Click Recipients. You will see the existing recipient list there. If you want to send the project to an existing list, select it. If you haven’t created a list yet, click here for instructions.
Note: You have two options available:
1. Send the project via email.
2. Share an auto-generated link with your audience.
1. Send Project via Email
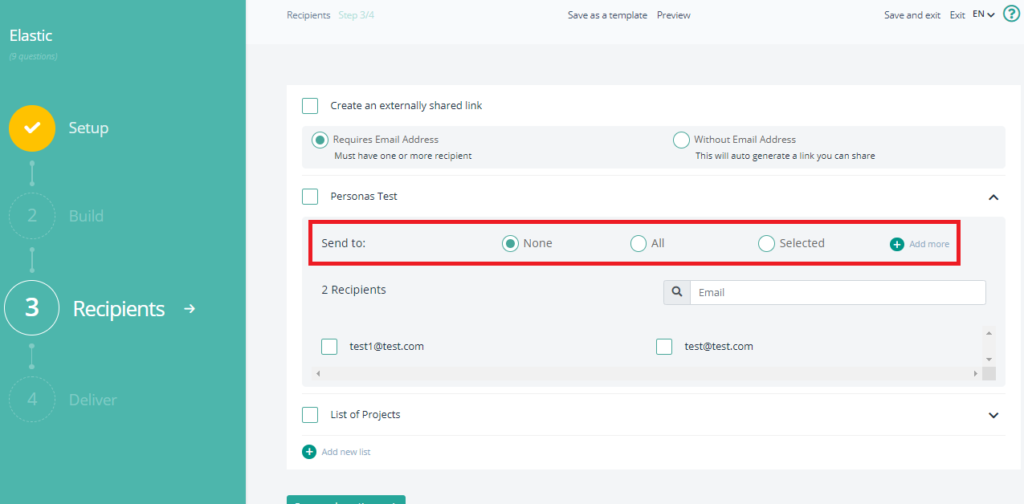
- Select the requires email address option. And choose the recipient list you have created.
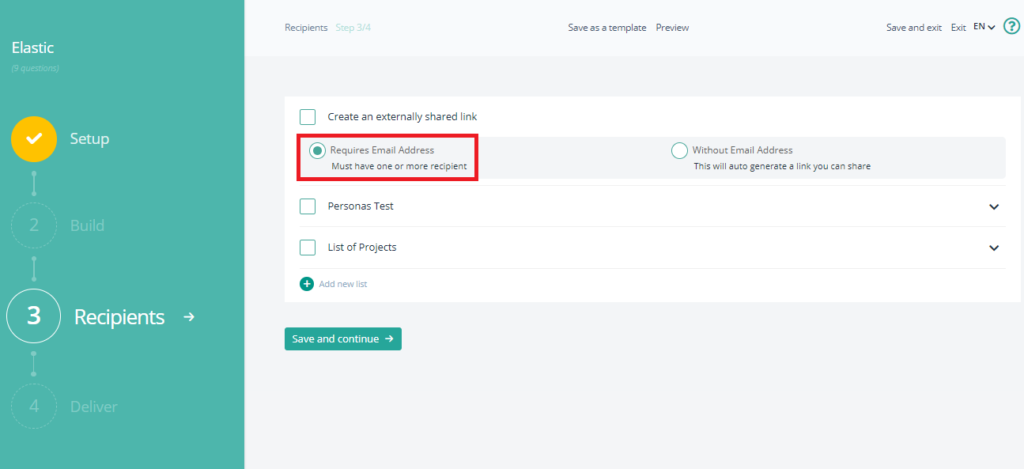
- If you want to send the survey to all recipients on the list, click “All.” If you prefer to send it to specific emails, click “Selected” and choose the recipients.
2. Share an auto generated link with your audience
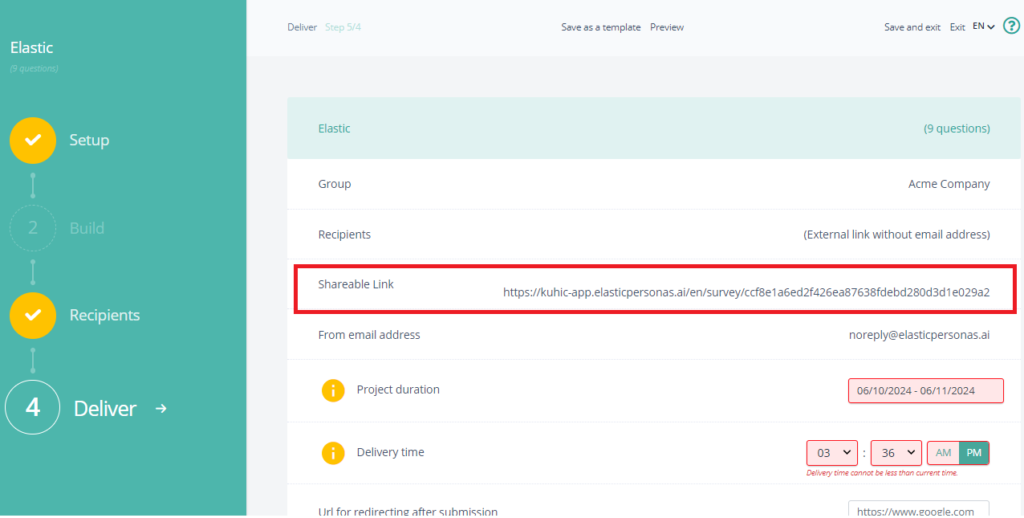
- To send the surveys directly using a sharing URL, select the “Without Email Address” option and click Save & Continue.
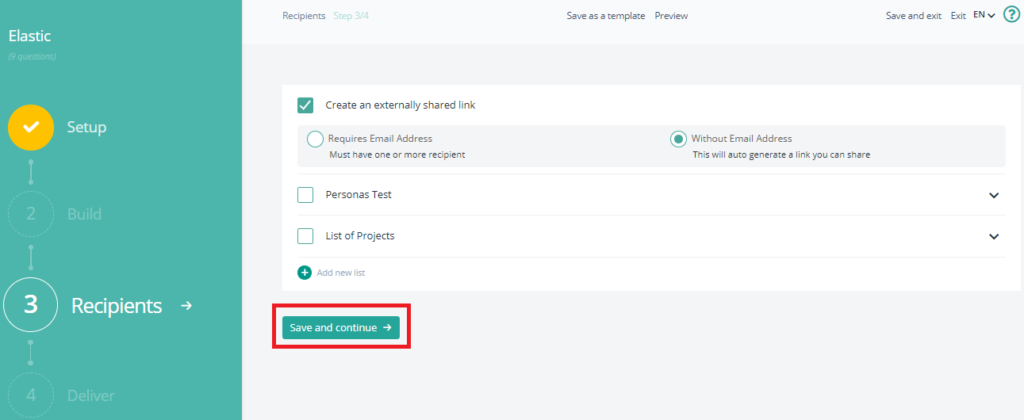
- Copy the link provided under the “Shareable Link” option and send it to your audience.
Step 4 > Deliver
- Review the project details.
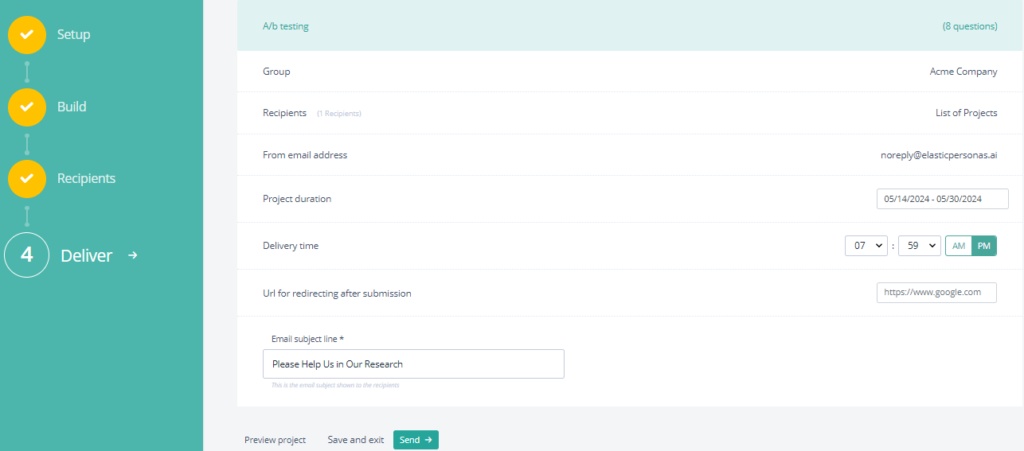
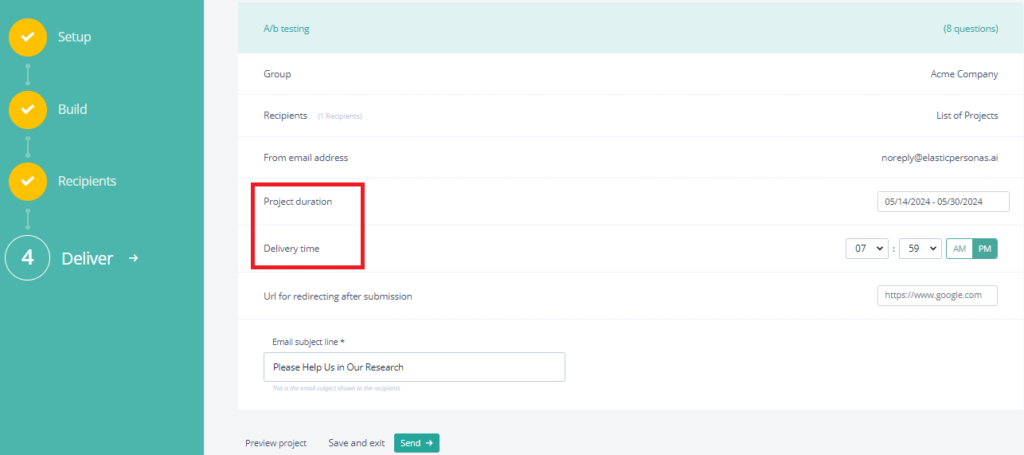
- Enter the project duration and set the project delivery time.
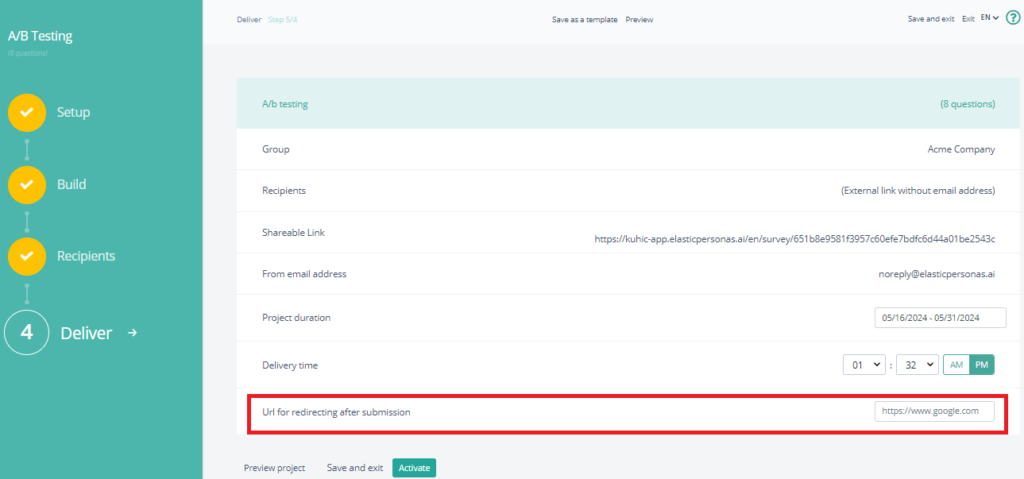
- Enter the redirection URL after submission. You can enter any URL here, such as your landing page, where you would like users to be redirected after submitting the survey.
- Add the email subject line and click “Save and Exit.”
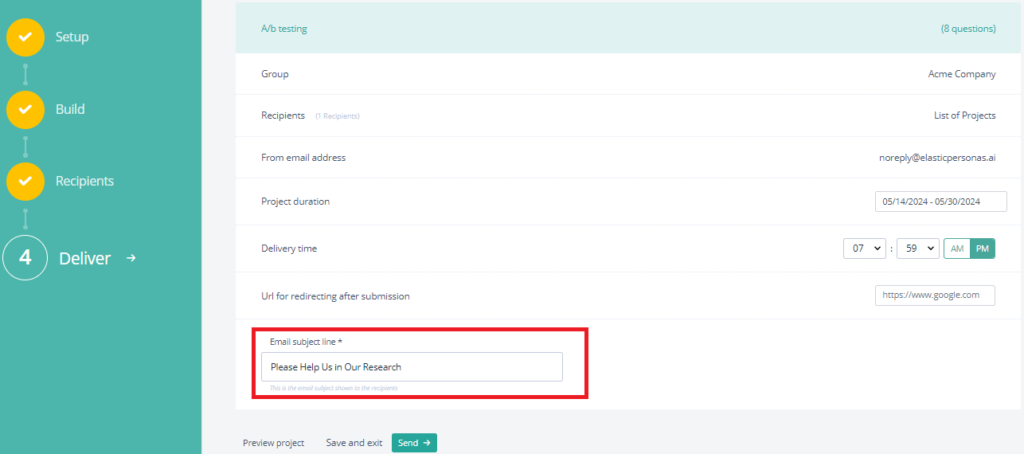
- Your project is ready. Preview it first, then you can send it by clicking the “Send it off” button.